
CVE-2023-26315
[[CVE]]
固件下载
Ubuntu25.10
IDA9.1
binwalk
qemu
firmwalker
固件解包&解密
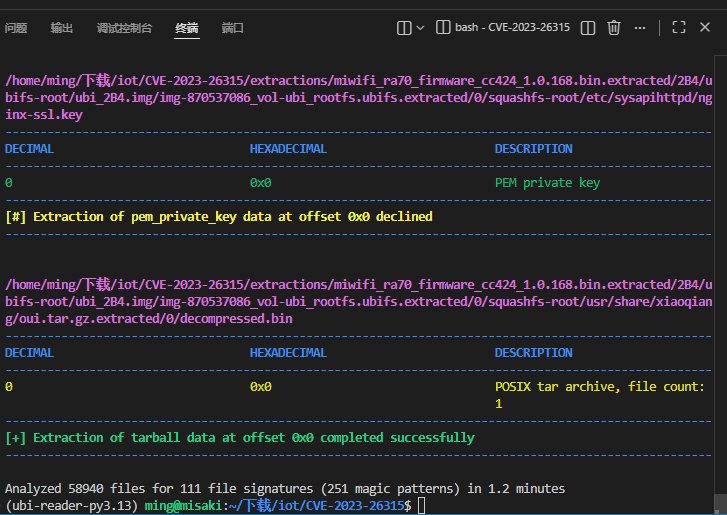
需要用到ubireader_extract_imageUBI Reader 是一个 Python 模块和脚本集合,能够提取 UBI 和 UBIFS 镜像的内容,并分析这些镜像以确定使用 mtd-utils 工具重新创建它们的参数设置
先下载poetry
1 | pip install poetry |
安装 UBI Reader
1 | git clone https://github.com/onekey-sec/ubi_reader |
启动虚拟环境
1 | source /root/.cache/pypoetry/virtualenvs/ubi-reader-lHfwYMKj-py3.10/bin/activate |
binwalk解包
1 | binwalk -Me miwifi_ra70_firmware_cc424_1.0.168.bin |
但是其中小米的前端也是用的Lua编写的并不是可以直接反编译的文件,需要使用unluac_miwifi进行反编译
1 | git clone https://github.com/NyaMisty/unluac_miwifi.git |
1 | import os |
脚本一键处理lua反编译,其中 /home/ming/下载/unluac_miwifi/build/unluac.jar改为自己的路径地址
固件模拟
这边是根据这位师傅的文章进行配置的 ZIKH26
宿主机ip配置
1 | sudo ip tuntap add dev tap0 mode tap |
qemu系统模拟
1 | sudo qemu-system-aarch64 -M virt -cpu cortex-a53 -m 1G -initrd ./initrd.img-5.10.0-29-arm64 \ |
配置qemu模拟出来的虚拟机网络
1 | ip add add 192.168.122.130/24 dev enp0s1 |
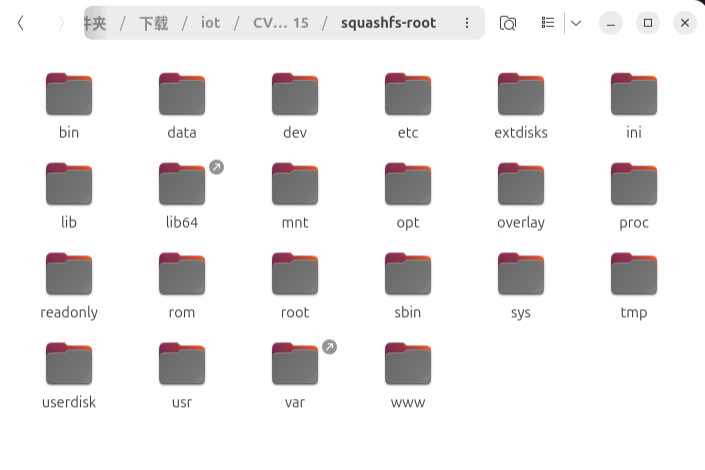
传入 squashfs-root
1 | tar -zcvf squashfs-root.gz squashfs-root |
挂载配置
1 | cd squashfs-root/ |
webserver启动
我们先来搜索有关 webserver 程序
1 | find /etc/ -name "*http*" |

1 | /etc/init.d/sysapihttpd |
主要有这三个
我们再来分析 /etc/sysapihttpd/sysapihttpd.conf 启动项,这是小米路由器管理 Web 入口:前端是定制 nginx sysapihttpd
sysapihttpd.conf 里实际打开了这些端口:
- 80:主 Web 管理入口,root 为 /www
- 8098:web 初始化重定向端口
- 8080:注释写着 “not use”,但配置仍然 listen 8080
- 8999:访客 portal / wifishare.html
- 443 ssl:HTTPS 管理入口,使用 /etc/sysapihttpd/cert.crt 和 cert.key
其中 uhttpd是监听的 80 和 443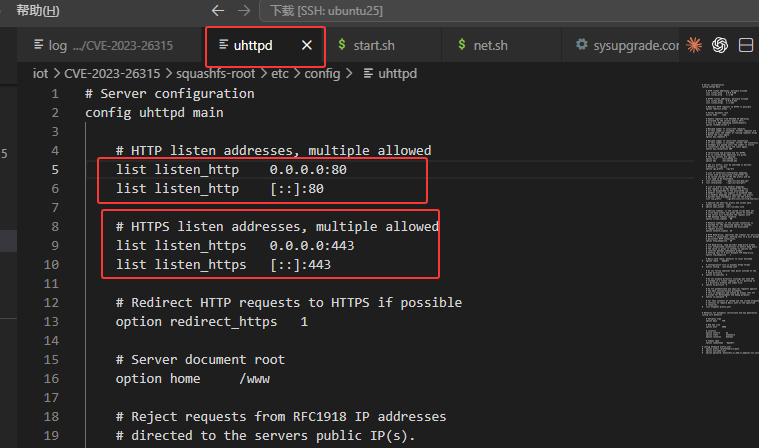
但 sysapihttpd也监听了 80 和 443并对其操作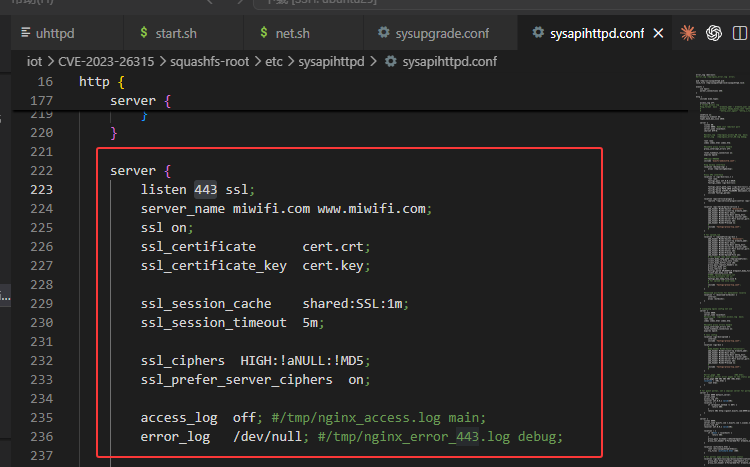
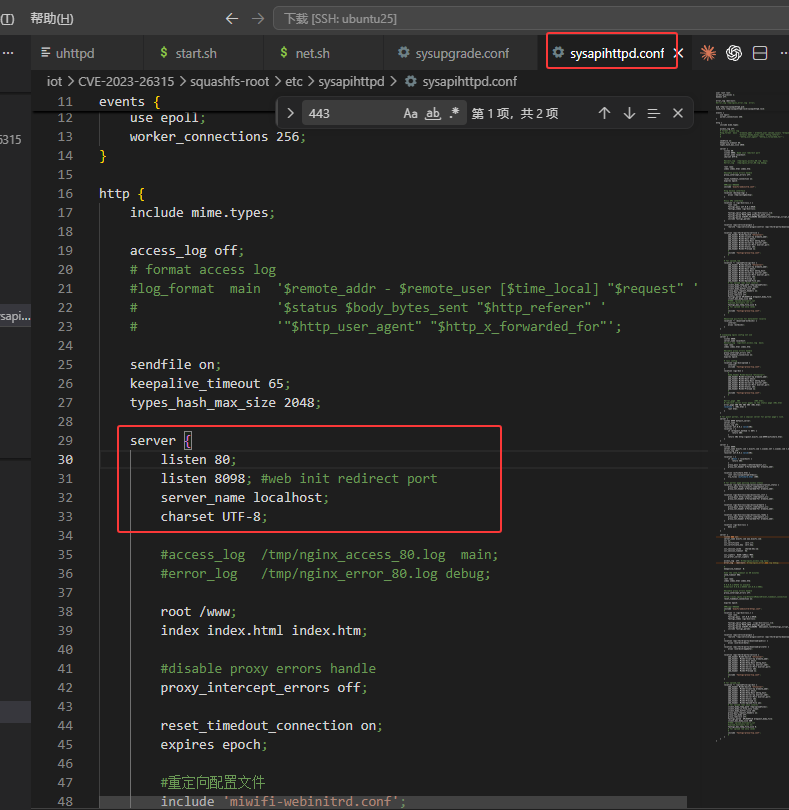
而 mihttpd监听的是 8198,但主要作用是 API可以不进行启动,对我们复现没有影响
在启动之前我们需要将sysapihttpdkeypatch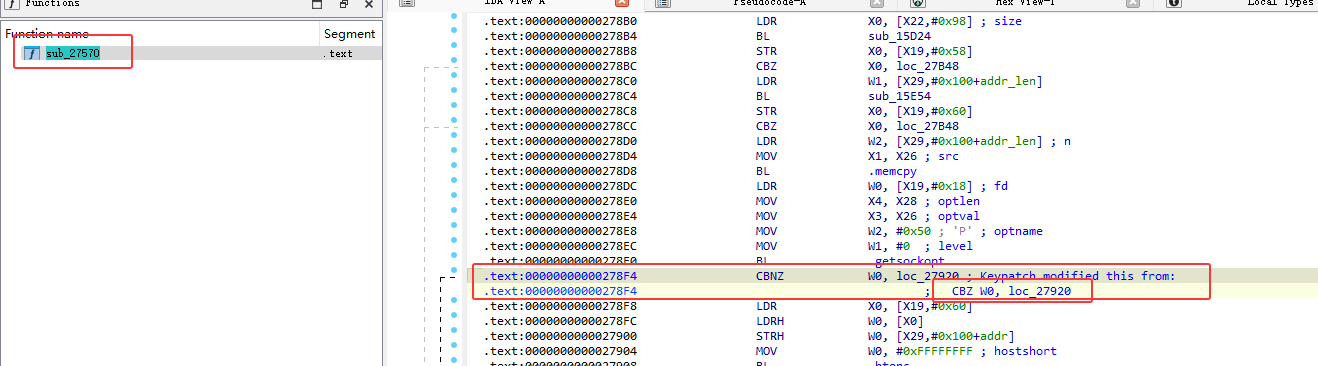
将此处修改后再重新传入运行
所以我们只需要单启动 sysapihttpd即可
1 | /etc/init.d/sysapihttpd start |

报错,缺少 procd_sysapihttpd.lock 文件,在对应目录创建即可
1 | touch /var/lock/procd_sysapihttpd.lock |
再运行
1 | /etc/init.d/sysapihttpd start |
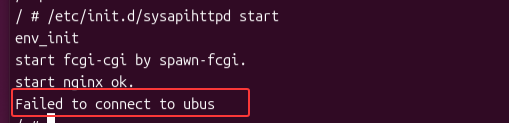
报错 Failed to connect to ubus,需要使用 ubus 总线通信
1 | /sbin/ubusd & |
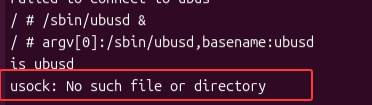
再次运行sysapihttpd,还是报错,我们复制字符串内容,使用ida打开 ubusd查看问题
将 /var/run/ubus.sock文件路径传入变量,后续传入 usock 函数中,错误即返回到else中,我们在其位置创建文件即可
1 | touch /var/run/ubus.sock |

再次运行sysapihttpd
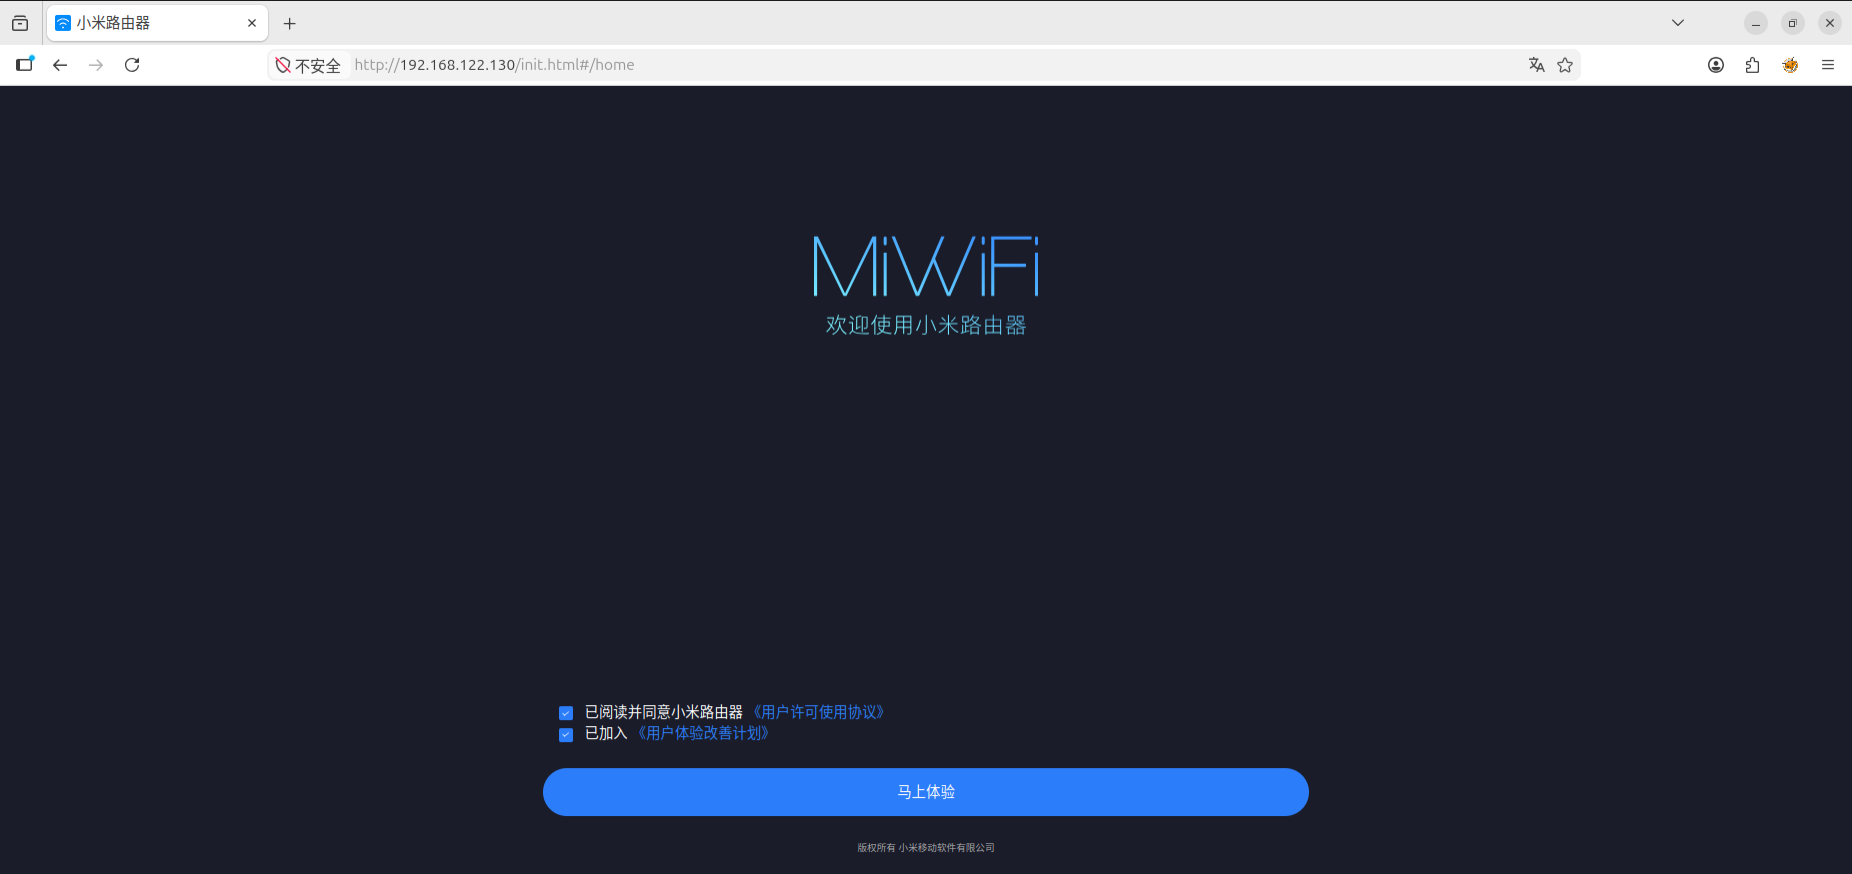
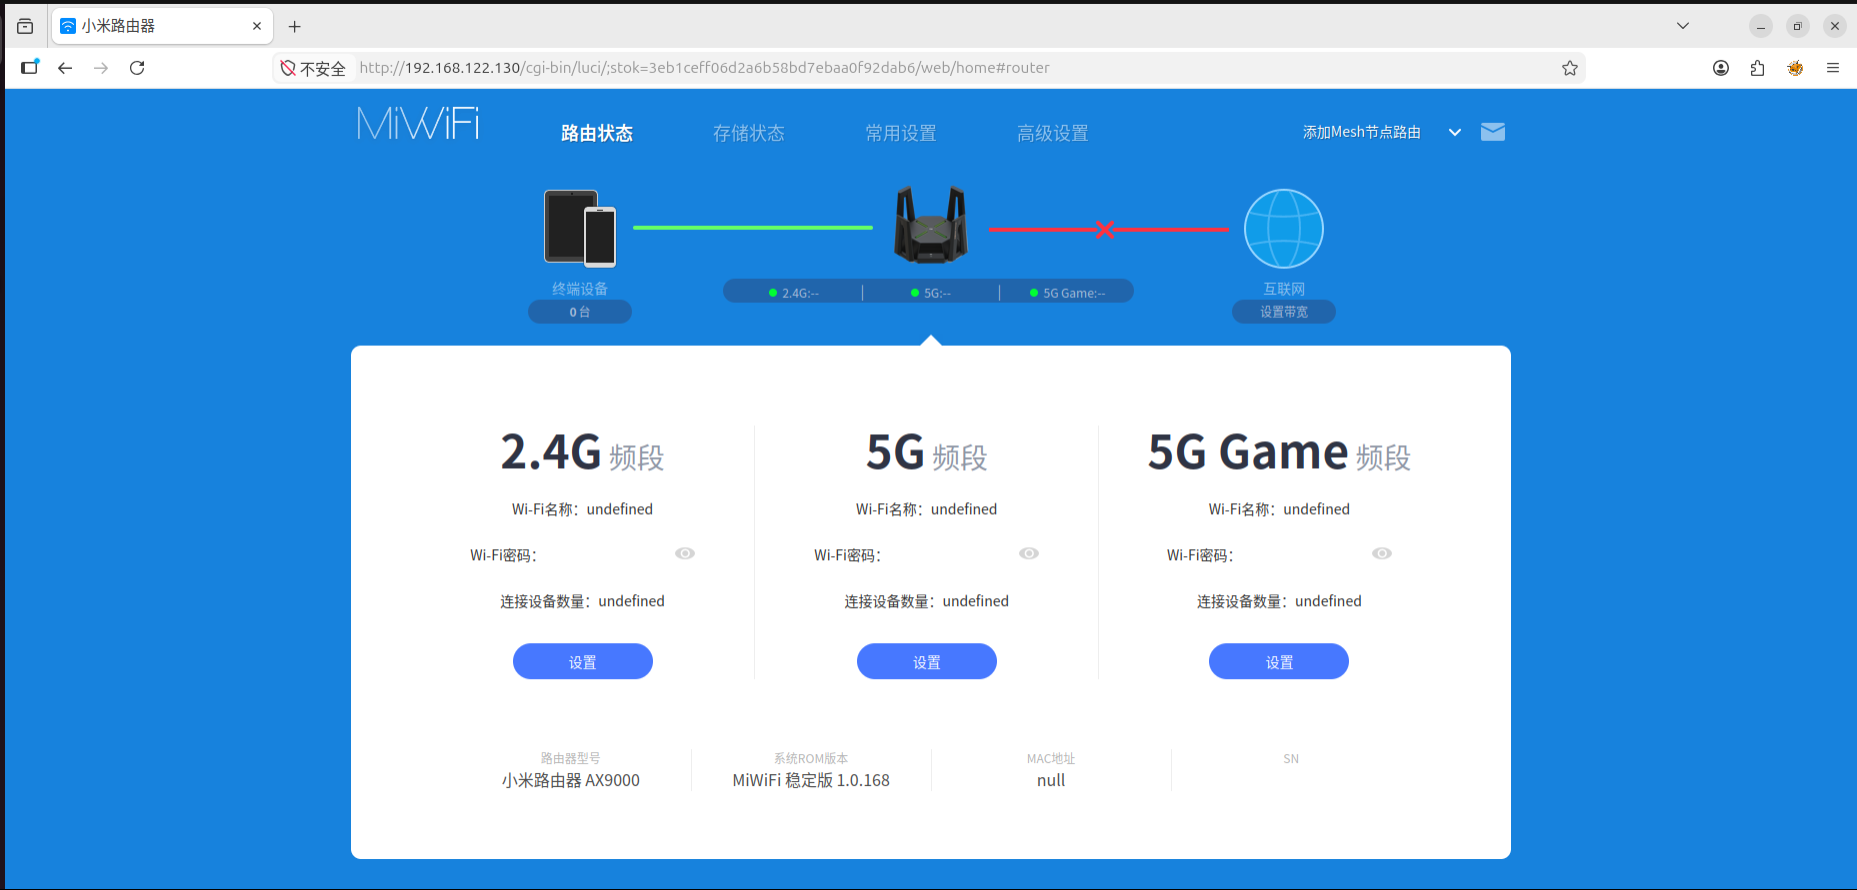
访问ip,启动成功
跳过初始化配置
我们使用 grep 查找那些文件会重定向至/init.html
1 | grep -r "/init.html" |
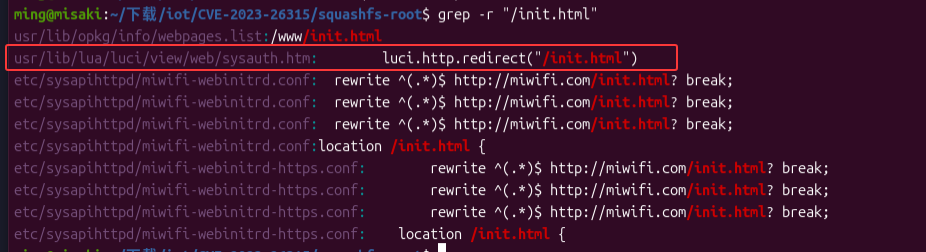
我们定位到 usr/lib/lua/luci/view/web/sysauth.htm中,我们来对这个文件进行分析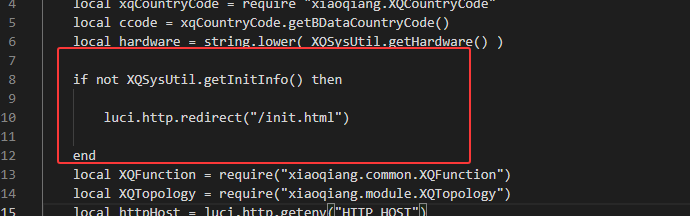
我们需要绕过这个if判断,使其不再跳转到 init.html 页面中,避免初始化操作,我们去定位 XQSysUtil 反编译后的内容,查看 XQSysUtil.getInitInfo()的返回值是这么来的
1 | L0 = require |
通过ai进行反编译得到
1 | local XQPreference = require("xiaoqiang.XQPreference") |
通过 XQConfigs.PREF_IS_INITED 去读取 key再通过key去获取配置
我们再从反编译的 XQConfigs中查找是如何去获取对应的 key的
1 | PREF_IS_INITED = "INITTED" |
发现 PREF_IS_INITED是定义好的常量 INITTED
所以
1 | local key = XQConfigs.PREF_IS_INITED |
等同于
1 | local value = XQPreference.get("INITTED") |
我们再去分析 XQPreference.get()是如何获取数据的
1 | local L0, L1, L2, L3 |
转换为
1 | function get(key, default_value, package_name) |
带入 key="INITTED"总结为
1 | local value = uci:get("xiaoqiang", "common", "INITTED") |
并且 UCI 是 OpenWrt 的配置系统,uci:get(配置文件名, 节名, 选项名)
配置文件名=”xiaoqiang”
节名=”common”
选项名=”INITTED”
总结就是 检查 /etc/config/xiaoqiang 的 common 节里有没有 INITTED 这个选项
所以我们需要绕过if判断,只要让 INITTED 存在即可
1 | uci set xiaoqiang.common.INITTED=1 |
重新访问 http://192.168.122.130/
绕过初始化
设置登录密码
1 | grep -r "checkuser" |
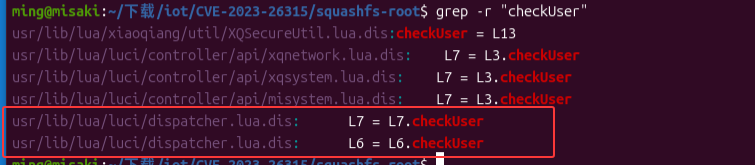
我们锁定到 usr/lib/lua/luci/dispatcher.lua.dis 中
1 | loginAuthenFailed = L10 |
转换为
1 | local username = luci.http.xqformvalue("username") |
请求参数中取 username/password/nonce
有 nonce:走 checkNonce + checkUser
没有 nonce:走 checkPlaintextPwd
我们先去分析 checkUser是这么去检测的
1 | local function checkUser(username, nonce, password) |
通过 account 读取用户名 ,并且这个值还是 hash
然后再通过 XQCryptoUtil.sha1(nonce .. stored_hash)和获取到的 password字段作比较
其中 在squashfs-root/etc/config/account,存储的hash为
1 | config core 'common' |
就是如果 “account”=’admin’,则获取到的hash值为 'b3a4190199d9ee7fe73ef9a4942a69fece39a771'
我们再来分析 没有 nonce 中的checkPlaintextPwd
1 | local stored_hash = XQPreference.get(username, "", "account") |
如果没有传 nonce,那它把请求里的 password 当成明文密码,带入到
1 | sha1(plaintext_password .. "a2ffa5c9be07488bbb04a3a47d3c5f6a") |
进行计算,再去和 account中的hash比较
我们再去查看 checkNonce做了什么
1 | local function checkNonce(nonce, remote_mac) |
nonce 按 _ 分割,要求一共分成4段
1 | local nonce_type = tonumber(parts[1]) |
但实际只用上了三段
在前端中
1 | var nonce = Encrypt.init(); |
用户名字段固定写死为 admin
password为oldPwd
再来看 oldPwd()
1 | key:"a2ffa5c9be07488bbb04a3a47d3c5f6a" |
SHA1是通过 XQSecureUtil
1 | local function checkUser(username, nonce, password) |
1 | SHA1(nonce + stored_hash) |
所以 account 里存的值 == SHA1(明文密码 + 固定key)
设 明文密码为admin
1 | SHA1("admin" + "a2ffa5c9be07488bbb04a3a47d3c5f6a") |
我们设置 account.common.admin为b3a4190199d9ee7fe73ef9a4942a69fece39a771即可
1 | uci set account.common.admin=b3a4190199d9ee7fe73ef9a4942a69fece39a771 |
漏洞分析
通过 /usr/lib/lua/luci/controller/api/xqdatacenter.lua中
1 | L0.sysauth = "admin" |
未认证会走 jsonauth 认证器/api/xqdatacenter这个API端点需要用户登录认证,并且用户名被设置为 admin
但是在/api/xqdatacenter/request这个入口没有设置flag位
1 | entry({"api","xqdatacenter","request"}, call("tunnelRequest"), _(""), 301) |
并且第五位会保存为flag字段,而且后续会定位到 tunnelRequest 函数中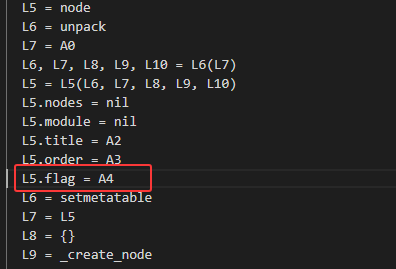
所以如果请求为
1 | POST /cgi-bin/luci/api/xqdatacenter/request |
所以就得
1 | entry({"api","xqdatacenter","request"}, call("tunnelRequest"), _(""), 301) |
再根据
1 | function _noauthAccessAllowed(flag) |
如果 flag 没设置,返回 false,只有flag & 1 == 1才可以绕过鉴权
我们接着分析 tunnelRequest 函数
1 | function tunnelRequest() |
在tunnelRequest函数中会对接收到的payload字段数据并且进行binaryBase64Enc加密
1 | THRIFT_TUNNEL_TO_DATACENTER = "thrifttunnel 0 '%s'" |
我们再分析 thrifttunnel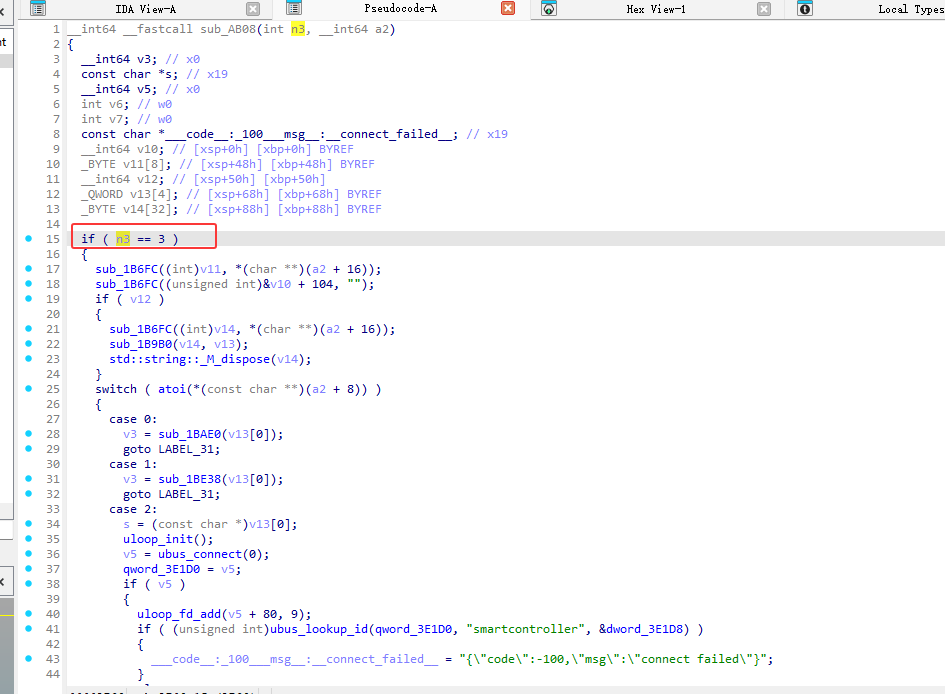
if ( n3 == 3 ) 检查参数个数是否为3
1 | argv[0] ="thrifttunnel" |
将 base64_string内容复制到v11中
又将base64_string内容复制到v14中,进行解码操作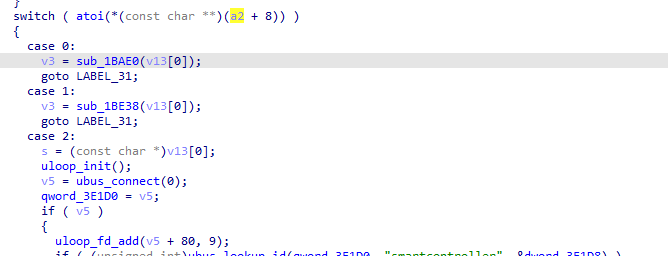
后续switch ,a2+8对应argv[1] ="0",即case 0:v3 = sub_1BAE0(v13[0]);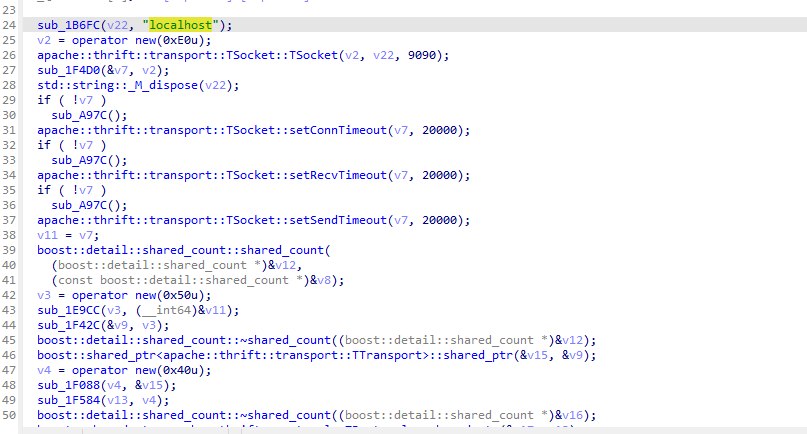
创建了 socket接受的json字符串,即payload,发送给9090端口
其中 /usr/sbin/datacenter是一直监听的9099端口,后续分析 datacenter文件。(其实不是很清楚为什么知道是 datacenter 监听的9099端口,这边是根据别的师傅的文章才知道的)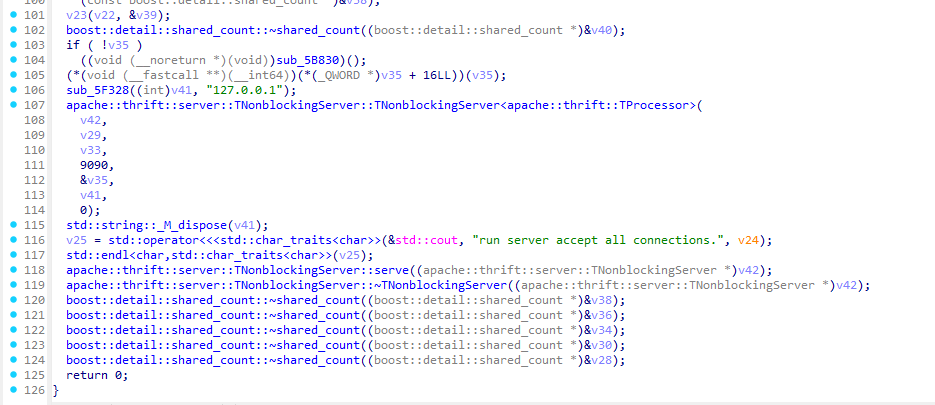
datacenter创建了监听9090端口
在datacenter中搜索request函数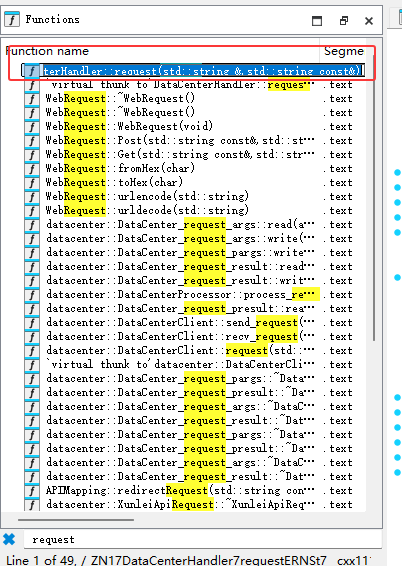
我们继续分析 DataCenterHandler::request 函数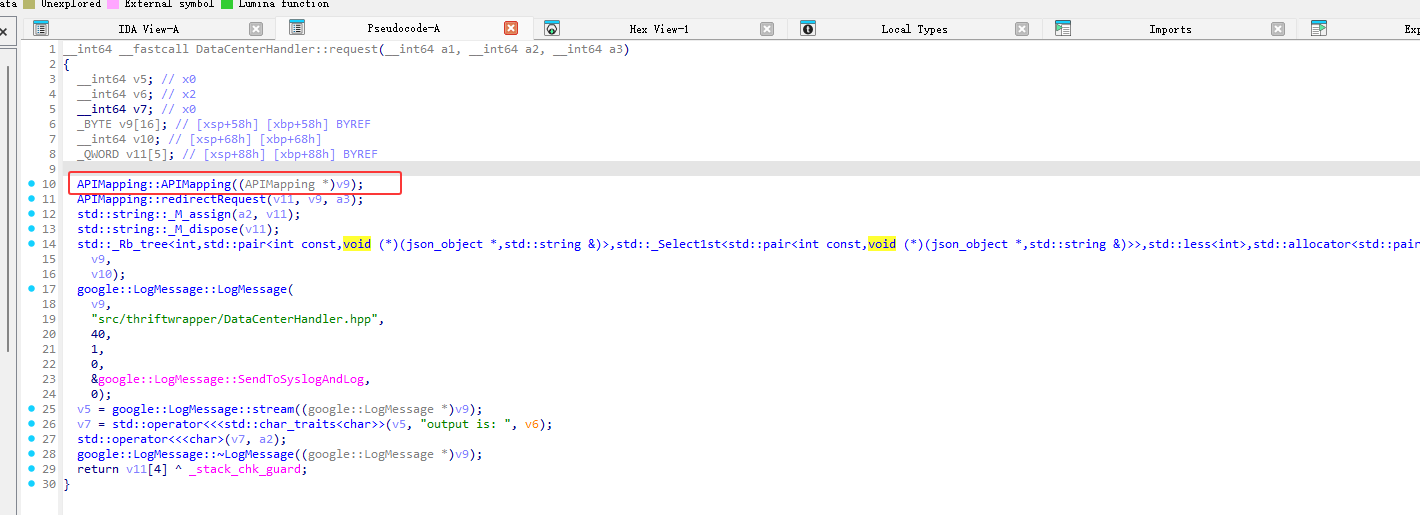
调用了 APIMapping::APIMapping((APIMapping *)v9);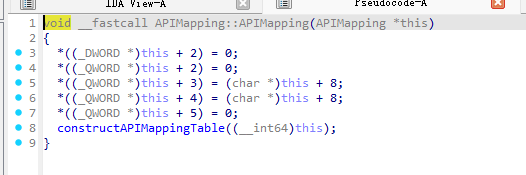
又调用constructAPIMappingTable初始化API
漏洞位置就是在datacenter::PluginApiCollection::sConstructMappingTableapi为629的时候,对应的handler是callPluginCenter就能到达漏洞点
复现
启动服务
1 | /usr/sbin/datacenter & |
poc
1 | import requests |
token为
执行